The Paradox of Information: Why More Notes ≠ More Clarity
A simple guide to turning information overload into clear thinking using the CODE method.
How I stopped drowning in my own notes and started getting stuff done
The Problem: Information Overload
When was the last time you felt overwhelmed by your own notes, bookmarks, or saved articles?
You’re not alone. We save everything “just in case,” but end up with digital clutter that makes us less clear, not more. This is the Information Paradox: more notes = less clarity.
Why This Happens
1. We Confuse Saving with Understanding
Saving feels productive, but it’s often just collecting. Ask yourself: How many saved articles do you actually use?

2. Our Brains Aren’t Filing Cabinets
Without organization, finding information becomes exponentially harder as your note count grows.
3. We Fear Missing Out
We save everything, creating mental clutter that blocks clear thinking.
4. The Hoarding Feeling
There’s something comforting about having information “just in case.” It feels like security—like having extra food in the pantry during uncertain times. But this comfort comes at a cost.
The anxiety of letting go: What if you delete that article and need it tomorrow? What if you miss the perfect insight? This fear keeps us holding onto digital clutter.
The illusion of control: Having 500 unread articles feels like having options. But it’s really just procrastination disguised as preparedness.
The emotional attachment: Some notes represent hours of learning, late-night discoveries, or “aha!” moments. Deleting them feels like erasing part of your intellectual journey.
Breaking the cycle: The hoarding feeling is real, but it’s based on scarcity thinking. In our information-rich world, most insights are rediscoverable. What matters is curating what serves your current goals, not stockpiling for every possible future.
The Solution: The CODE Method
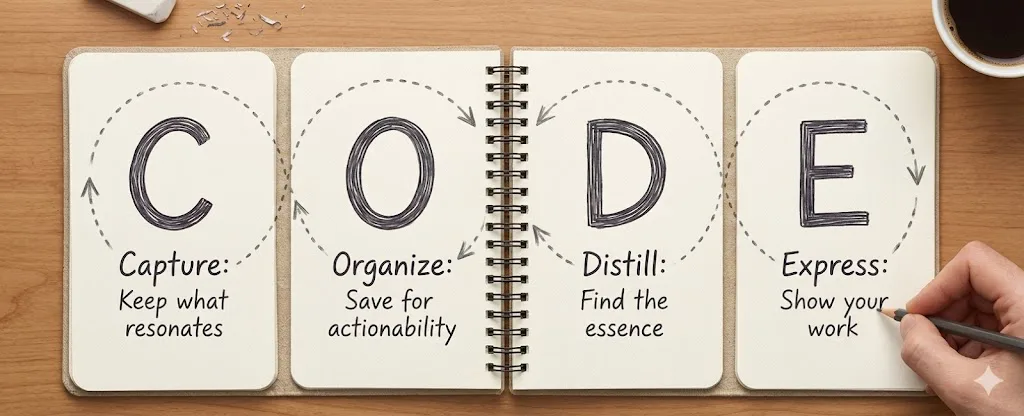
CODE here is an aconym for Capture-Organise-Distill-Express method, I borrowed this from Tiago Forte’s Second Brain system, but simplified it down to what actually works for me. It’s a 4-step process that turns information chaos into clarity.
C - CAPTURE: Save Only What Resonates
Don’t save everything. Only capture what makes you pause, think, or feel something.
Before saving anything, ask yourself: “Does this genuinely interest me or challenge my thinking?”
O - ORGANIZE: Group by What You’re Doing
Forget topic folders. Organize by your actual projects and responsibilities.
The PARA System:
- Projects: What you’re working on now (e.g., “Job interview prep”)
- Areas: Ongoing responsibilities (e.g., “Health tracking”)
- Resources: Topics you reference (e.g., “Productivity tips”)
- Archives: Completed or someday items
Why it works: Information appears when you need it, not when you saved it.
D - DISTILL: Extract the Essence
Don’t keep full articles. Summarize progressively:
- Bold key sentences (10-20% of the text)
- Highlight key phrases within those sentences
- Write a 3-sentence summary in your own words
Result: Scanning takes seconds, not minutes.
E - EXPRESS: Use Your Notes to Create
Notes aren’t storage—they’re fuel for creation.
Turn notes into:
- An email explaining an idea
- A social media post
- A project plan
- A conversation with a colleague
Basically, stop collecting and start making stuff.
How CODE Fits Into Everything Else
CODE works with whatever system you’re already using. Here’s what changed for me:
1. One Place for Everything
Pick one workspace. CODE just adds the knowledge layer on top:
- Capture feeds your central workspace with curated insights
- Organize creates structure within your workspace
- Distill keeps your workspace clean and scannable
- Express turns workspace knowledge into action
2. Works With Your Task System
If you split tasks into quick/scheduled/backlog, CODE slots right in:
- Quick tasks: Use distilled notes for 2-minute actions
- Scheduled tasks: Block time to express ideas from organized notes
- Backlog tasks: Keep research notes in archives for future projects
3. Weekly Reviews Get Better
I do a weekly reset. Adding CODE to it looks like:
- Review captured items: Decide what resonates vs. what to archive
- Reorganize notes: Move completed projects to archives
- Distill backlog: Turn accumulated notes into actionable insights
- Plan expression: Schedule time to create from your knowledge base
4. You Can Automate Stuff
Once you have a system, you can template it:
- Template notes: Reuse distilled structures for similar projects
- Tag systems: Automate retrieval of related information
- Quick capture: Instant saving reduces friction in your workflow
5. Focus on What Matters
CODE helps you find and use knowledge that actually moves the needle:
- Capture unique insights: Build personal knowledge that gives you an edge
- Express original ideas: Create content that compounds over time
- Distill expertise: Turn broad learning into specific, applicable knowledge
The point is: your task system handles what you do, CODE handles what you know. They work better together.
For Technical Stuff (Datasheets, etc.)
I use Evernote and OneNote for technical docs. Here’s my setup:
Evernote Setup
Organize with Stacks & Notebooks:
- Projects Stack: Active technical projects (e.g., “STM32 Motor Control”, “Sensor Calibration”)
- Areas Stack: Ongoing technical responsibilities (e.g., “Embedded Systems”, “IoT Protocols”)
- Resources Stack: Reference materials (e.g., “Datasheets”, “API Docs”, “Tutorials”)
- Archives Stack: Completed projects and old references
Tags for Technical Retrieval:
- Component tags:
stm32,esp32,raspberry-pi,arduino - Topic tags:
i2c,spi,uart,adc,pwm,interrupts - Application tags:
motor-control,sensor-fusion,power-management,wireless - Status tags:
to-implement,working,debugging,reference
OneNote Setup
Organize with Notebooks & Sections:
- Projects Notebook: Each project as a section with pages for different aspects
- Areas Notebook: Ongoing technical domains as sections
- Resources Notebook: Technical references organized by topic
- Archives Notebook: Completed work
Tags & Categories:
- Use OneNote’s built-in tags: Important, Question, Definition, etc.
- Create custom tags for technical categories
- Use page templates for consistent datasheet summaries
Technical Note Distillation Process
For Datasheets & Reference Manuals:
- Quick Scan: Note the key specifications, pinouts, and block diagrams
- Bold Key Specs: Pin numbers, voltage ranges, timing requirements
- Highlight Gotchas: Important warnings, limitations, or common pitfalls
- Tag Relationships: Link related components, protocols, or applications
Example Datasheet Note Structure:
# STM32F103C8T6 Datasheet Summary

**Key Specs:**
- **Core:** ARM Cortex-M3 @ 72MHz
- **Flash:** 64KB, **SRAM:** 20KB
- **GPIOs:** 37 total, **ADC:** 12-bit, 10 channels

**Critical Pinouts:**
- **PA0-PA7:** ADC inputs (highlight in red)
- **PB10/PB11:** USART3 (common for debugging)

**Common Gotchas:**
- **ADC reference voltage** affects accuracy
- **Flash write protection** can lock you out
- **Watchdog timer** resets if not fed regularly

**Tags:** #stm32 #arm-cortex-m3 #adc #usart #gpio
Smart Retrieval System
The key challenge isn’t collecting—it’s finding exactly what you need when you need it.
Tag-Based Filtering:
- Search:
tag:stm32 tag:adcfinds all ADC-related STM32 notes - Search:
tag:i2c tag:sensorfinds I2C sensor implementations - Search:
tag:esp32 tag:wififinds ESP32 WiFi code examples
Context-Based Organization:
- Problem-focused: When debugging, search by symptom (e.g., “adc noise”, “i2c hang”)
- Component-focused: When designing, search by part (e.g., “stm32 timer”, “esp32 ble”)
- Project-focused: When implementing, search by application (e.g., “motor control pid”)
Hardware Design Decisions
Before you start reading datasheets, you’ve got questions: Which MCU? I2C or SPI? Is this sensor worth it?
The trick isn’t reading more datasheets—it’s knowing what to look for. Here’s how I use CODE for hardware decisions:
Core Questions to Ask First
Before considering any components or protocols, ask yourself these fundamental questions about your project:
- What are the core functions this system must perform? (e.g., sensing, actuation, communication, data processing)
- What performance requirements must be met? (speed, accuracy, power consumption, real-time constraints)
- What is the budget and timeline for this project? (component costs, development time, prototyping schedule)
- What is the team’s experience level with different technologies? (familiarity with microcontrollers, protocols, development tools)
- How many tasks need to run simultaneously? (parallel processing requirements, interrupt handling, multi-threading needs)
- What are the environmental and reliability constraints? (temperature range, vibration, power stability, failure tolerance)
Answer these first. Otherwise you’ll spend three days comparing chips before realizing none of them fit your actual requirements.
Don’t Skip This Step
Many engineers jump straight to component shopping without clarifying requirements. This leads to picking familiar parts instead of optimal ones. Take 15 minutes to answer these questions—your future self will thank you during debugging.
The Hardware Design Decision Template
Before opening any datasheet, create this structure:
graph TD
    A[Core Questions] --> B[Requirements Capture]
    B --> C[Constraints Assessment]
    C --> D[Decision Categories]
    D --> E[Success Criteria]

    style A fill:#e1f5fe
    style B fill:#f3e5f5
    style C fill:#fff3e0
    style D fill:#e8f5e8
    style E fill:#ffebee
Here’s the basic flow:
1. Requirements Capture
- Functional requirements: What must the system do? (e.g., “Measure temperature every 5 seconds”, “Control 3 motors simultaneously”)
- Performance requirements: Speed, accuracy, power consumption targets
- Interface requirements: How does it connect to other systems?
2. Constraints Assessment
- Budget: Component costs, development time value
- Timeline: How long until you need a working prototype?
- Learning curve: Team experience level with different technologies
- Task parallelism: How many things need to happen simultaneously?
3. Decision Categories
- Microcontroller: Processing power, peripherals, power consumption
- Communication protocols: Speed vs. complexity trade-offs
- Sensors/Actuators: Accuracy vs. cost vs. availability
- Power management: Battery life vs. performance requirements
4. Success Criteria
- Must-have: Deal-breakers (e.g., “Must run on battery for 1 week”)
- Nice-to-have: Bonus features (e.g., “WiFi would be convenient”)
- Risk factors: What could go wrong? (e.g., “Vendor might discontinue this chip”)
Navigating Documentation with CODE
Don’t read everything—read strategically:
graph LR
    A[Requirements Template] --> B[Capture]
    B --> C[Organize]
    C --> D[Distill]
    D --> E[Express]

    B --> F[Smart Reading]
    C --> G[Structured Folders]
    D --> H[Comparison Tables]
    E --> I[Decision Memos]

    style A fill:#bbdefb
    style B fill:#c8e6c9
    style C fill:#fff9c4
    style D fill:#ffcdd2
    style E fill:#e1bee7
Capture: Smart Information Gathering
Research Like a Detective
Don’t read datasheets cover-to-cover. Scan for the 3-5 specs that directly impact your requirements. Ask: “Does this help me decide yes/no on this component?”
- Start with overviews: Read product briefs and application notes first
- Note key specs: Capture only numbers that matter to your constraints
- Flag uncertainties: Mark questions for deeper research later
- Limit per session: Set a 30-minute timer per component research
Organize: Structure Your Research
Plan your categories and tags upfront for easy retrieval—don’t organize as you go.
Planning Your Folder Structure
- Decision-focused folders: Create one folder per major choice (e.g., “MCU Selection”, “Communication Protocol”, “Sensor Choice”)
- Timeline-based subfolders: Within each decision folder, use “Research”, “Shortlist”, “Final Decision” subfolders
- Cross-reference folders: Add “Requirements Reference” and “Constraints Summary” folders that link to all decisions
Designing Your Tag System
Use a hierarchical tag structure for multi-dimensional retrieval:
- Component tags:
mcu:stm32,mcu:esp32,protocol:i2c,protocol:spi,sensor:temp,sensor:imu - Criteria tags:
budget:low,budget:medium,power:efficient,power:high,complexity:simple,complexity:advanced - Status tags:
research:initial,research:deep-dive,decision:shortlisted,decision:chosen,decision:rejected - Context tags:
project:current,team:junior,timeline:tight,reliability:critical
Retrieval Planning Matrix
Before researching, create a simple matrix of how you’ll find information later:
| When I Need To… | Search Tags | Folder Location | Example |
|---|---|---|---|
| Compare MCUs | mcu:* budget:* | MCU Selection/Research | “Find all low-budget MCUs” |
| Find protocol docs | protocol:i2c status:chosen | Communication Protocol/Final | “Get I2C implementation details” |
| Review constraints | criteria:budget project:current | Requirements Reference | “Check budget limits” |
| Debug issues | component:* problem:* | Project Issues | “Find ADC noise solutions” |
Linking Strategy
- Bi-directional links: Every component note links back to requirements and constraints
- Decision trail: Each final choice references the research notes that led to it
- Future reference: Tag notes with
future:*for similar projects (e.g.,future:battery-powered,future:industrial)
Seriously, spend 10 minutes planning your folder structure before you start researching. You’ll thank yourself later when you’re not scrambling to find that one datasheet at 2am.
Organization Debt
Poor folder/tag planning creates “organization debt” - you’ll spend more time searching than researching. Fix your structure early, or you’ll regret it during crunch time.
graph TB
    A[Raw Research Notes] --> B[Organize by Decision]
    B --> C[Tag by Criteria]
    C --> D[Link to Requirements]

    D --> E[MCU Selection Folder]
    D --> F[Protocol Choice Folder]
    D --> G[Sensor Selection Folder]

    E --> H[- budget:low <br/> - power:high]
    F --> I[- complexity:simple <br/> - timeline:tight]

    style A fill:#ffebee
    style B fill:#e8f5e8
    style C fill:#fff3e0
    style D fill:#f3e5f5
    style E fill:#e1f5fe
    style F fill:#e1f5fe
    style G fill:#e1f5fe
Distill: Extract Decision Insights
Distillation = Decision Acceleration
Raw research is overwhelming. Distilled comparisons make choices obvious. Spend more time distilling than collecting.
- Compare side-by-side: Create tables comparing options against your criteria
- Highlight trade-offs: Bold the key pros/cons for each choice
- Rate importance: Score each factor (1-5) based on your project priorities
Example Distillation Table:
| Criteria | STM32F103 | ESP32 | Decision Factor |
|---|---|---|---|
| Cost | $2.50 | $3.00 | STM32 cheaper |
| WiFi | No | Yes | ESP32 if needed |
| Power (sleep) | 10µA | 150µA | STM32 better |
| Learning | Moderate | Easy | ESP32 faster |
graph TD
    A[Multiple Options] --> B[Distill to Table]
    B --> C[Score Criteria 1-5]
    C --> D[Highlight Trade-offs]
    D --> E[Obvious Choice Emerges]

    style A fill:#ffebee
    style B fill:#fff3e0
    style C fill:#e8f5e8
    style D fill:#f3e5f5
    style E fill:#e1f5fe
Express: Build Your Design Rationale
Express = Execute
Great research means nothing if you don’t act on it. Express creates momentum—turn insights into implementation.
- Write decision memos: “Why STM32 + I2C + DHT22 sensor”
- Create implementation plans: Step-by-step build sequence
- Document alternatives: “We chose X over Y because…”
- Share with team: Turn research into clear recommendations
The Difference
Without this: Days comparing MCUs, 50 datasheets read, still not sure.
With this: Decisions in hours, documented reasoning, easy to adapt later.
I keep a “Design Decisions” notebook and review it after each project. Helps avoid repeating the same mistakes.
graph LR
    subgraph Design["Hardware Design Flow"]
        A[Requirements] --> B[MCU Selection]
        B --> C[Protocols]
        C --> D[Sensors]
        D --> E[Power]
        E --> F[Prototype]
    end

    subgraph CODE["At Each Step"]
        G[Capture<br/>research] --> H[Organize<br/>by decision]
        H --> I[Distill<br/>compare options]
        I --> J[Express<br/>document choice]
    end

    B -.-> G
    C -.-> G
    D -.-> G
    E -.-> G

    style A fill:#e1f5fe
    style B fill:#f3e5f5
    style C fill:#fff3e0
    style D fill:#e8f5e8
    style E fill:#ffebee
    style F fill:#e1f5fe
    style G fill:#c8e6c9
    style H fill:#fff9c4
    style I fill:#ffcdd2
    style J fill:#e1bee7
The idea: for each major decision (MCU, protocol, sensors, power), you run through the CODE cycle — capture research, organize by criteria, distill into a comparison, then document your choice.
Using Notes for Presentations & Communication
For Technical Presentations:
- Gather from multiple notes: Use tags to collect related information
- Create presentation outline: Distill key points into slides
- Build narrative: Connect technical details with practical implications
- Add visuals: Reference diagrams and pinouts from your notes
Example: Presenting a Motor Control Solution
- Slide 1: Problem Statement
- Pull from project notes: “Customer needs precise speed control”
- Slide 2: Technical Approach
- From STM32 notes: “TIMER peripheral with PWM output”
- From PID notes: “Proportional-Integral-Derivative algorithm”
- Slide 3: Implementation Details
- From datasheet notes: “TIM2 channels 1-3 for 3-phase PWM”
- From debugging notes: “Watch for timer overflow at high speeds”
- Slide 4: Results & Gotchas
- From testing notes: “Achieved ±1% accuracy”
- From lessons learned: “Filter encoder noise, calibrate PID gains”
For Team Communication:
- Code reviews: Reference specific datasheet sections or past implementations
- Design discussions: Share distilled notes instead of full manuals
- Documentation: Turn notes into clear API docs or setup guides
I keep a separate “Communication” section where I write dumbed-down versions of technical stuff for different people (managers, junior devs, customers who don’t care about the implementation).
Getting Started
Week 1: Clean Up
- Open your notes app
- Delete or archive 50% of old notes you never use
- Create a “Current Projects” folder
Week 2: Try CODE
- Capture: Save only 3 things that genuinely resonate
- Organize: Put them in your project folder
- Distill: Bold 2-3 key sentences each
- Express: Use one note to write a short post or email
Week 3: Build Habits
- Review and distill notes weekly
- Use notes for one small creation per week
- Notice how clarity improves
Common Questions
“But I might need that info someday!” Archive it. Archives are searchable but don’t clutter your active workspace.
“This seems like work!” It takes less time than constantly searching through disorganized notes.
“What if I organize wrong?” Notes are digital—reorganize anytime. The only wrong choice is no organization.
“My brain doesn’t work in folders?” Use tags, links, or any system that groups by what you’re actually doing.
That’s It
Look, it’s not about having perfect notes. It’s about having notes you can actually find and use. Everything else is just noise.