Build Systems in Embedded Development: From Make to Pigweed
Why does your code compile on your machine but fail on your teammate’s? Explore Make, CMake, and Pigweed—the tools that turn scattered C++ files into working firmware. Learn which one you actually need and why that answer might surprise you.
Ever spent hours debugging why your firmware which works on your machine but won’t compile on your teammate’s machine? Or wrestled with cryptic Makefiles that look like they were written in the 1990s (because they were)? You’re not alone.
Build failures on different machines and cryptic Makefiles are common causes of wasted development time; they usually stem from differences in build systems and toolchains.
Let’s talk about the tools that either make or break your embedded development workflow: Make, CMake, and Pigweed. By the end, you’ll know which one you actually need—and why that answer might surprise you.
Table of Contents
- The Build System Evolution
- Make: The Grandfather
- CMake: The Modernizer
- Pigweed: The Game Changer
- Which One Should You Use?
The Build System Evolution
Think about your last embedded project. How did you get from scattered .c files to a working .bin file flashed onto hardware?
main.c + hal_uart.c + startup.s + ... → Magic happens → firmware.bin
That “magic” is your build system. And here’s the thing: choosing the wrong one costs you days, sometimes weeks, of frustration.
The Journey
graph LR
    A[1980s-1990s<br/>Make Era] -->|Manual Everything| B[2000s<br/>CMake Era]
    B -->|Generated Builds| C[2020s<br/>Pigweed Era]

    A -.->|Problem| A1["Verbose syntax<br/>Platform-specific"]
    B -.->|Solution| B1["Meta-build system<br/>Cross-platform"]
    B -.->|Problem| B2["No HAL<br/>No protocols"]
    C -.->|Solution| C1["Complete framework<br/>Everything included"]

    style A fill:#f9f9f9
    style B fill:#e3f2fd
    style C fill:#e8f5e9
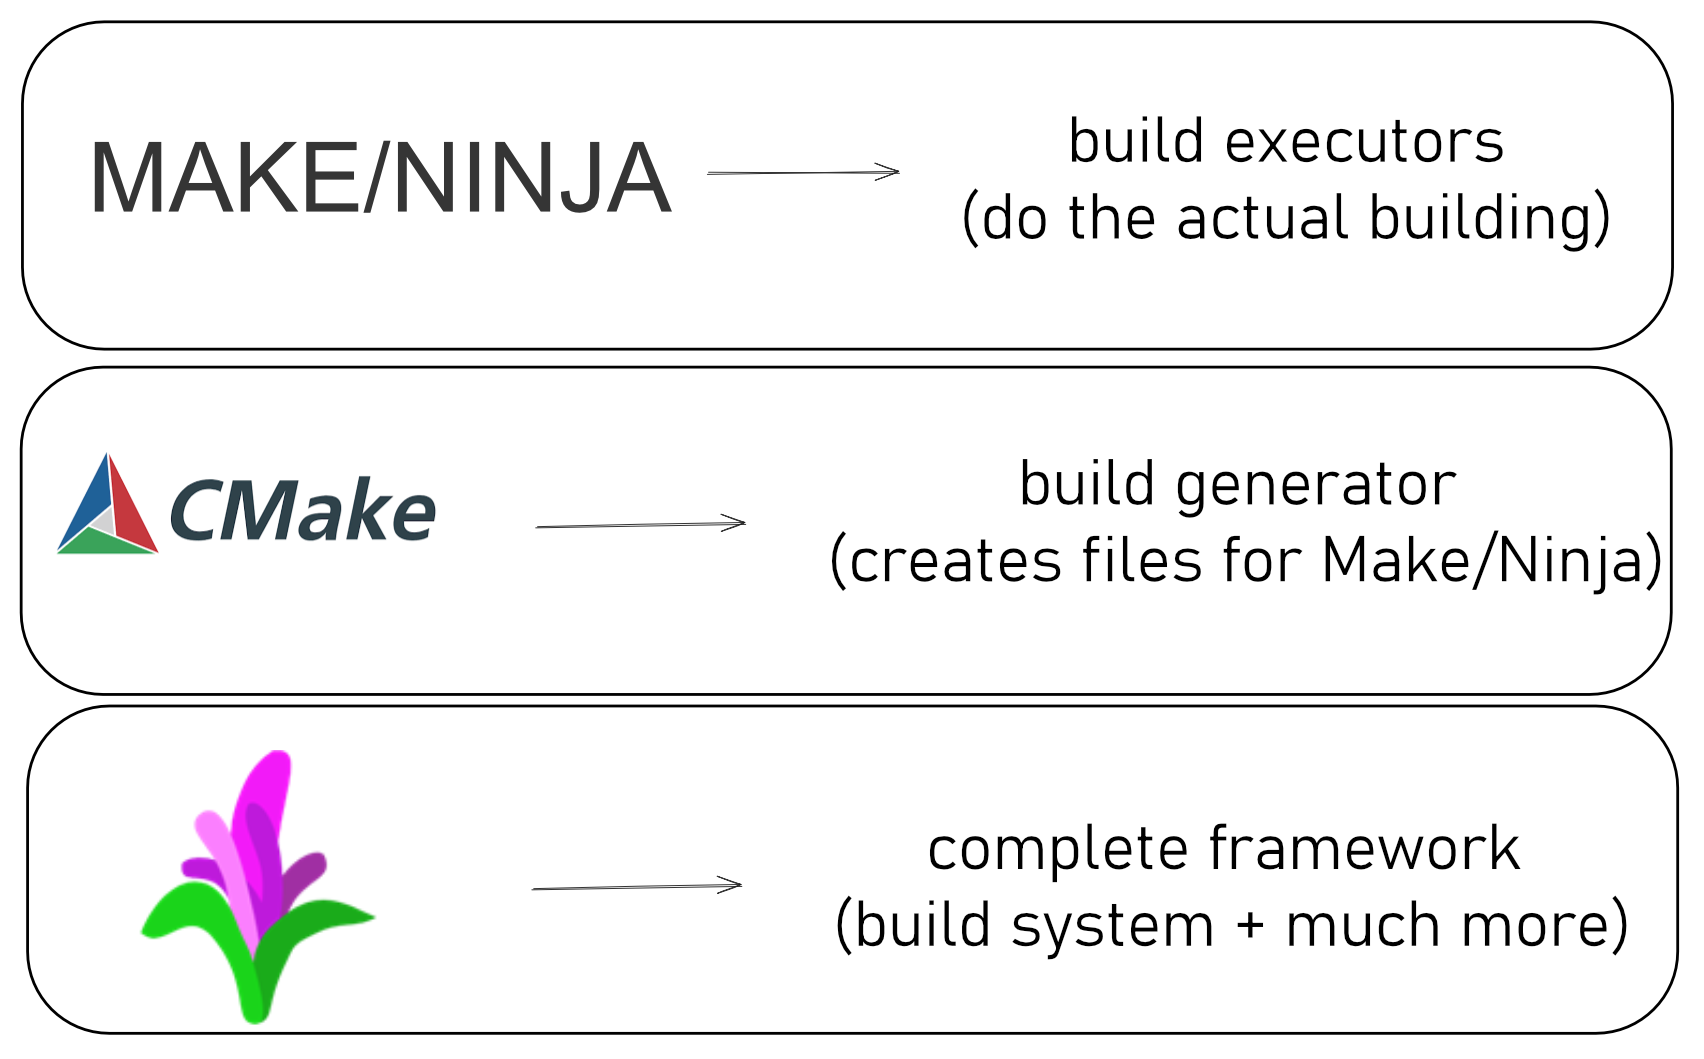
1980s-1990s: Make ruled everything. No alternatives.
2000s: CMake emerged—”Just write a simpler config file and we’ll generate the Makefile for you!”
2020s: Google releases Pigweed — a framework that bundles build tooling, toolchains, HALs, and protocols to reduce repetitive setup.
Each generation solved problems the previous one couldn’t. Let’s see why.
Make: The Grandfather
What Is Make?
Make is the OG build tool. If you’ve touched Linux or embedded development, you’ve probably seen a Makefile that looks like this:
CC = arm-none-eabi-gcc
CFLAGS = -mcpu=cortex-m4 -mthumb -O2

all: firmware.elf

firmware.elf: main.o hal.o
	$(CC) $(CFLAGS) main.o hal.o -o firmware.elf

main.o: main.c
	$(CC) $(CFLAGS) -c main.c

hal.o: hal.c
	$(CC) $(CFLAGS) -c hal.c

clean:
	rm -f *.o *.elf
Build Flow:
graph LR
    A[main.c] -->|compile| B[main.o]
    C[hal.c] -->|compile| D[hal.o]

    B -->|link| E[firmware.elf]
    D -->|link| E

    F[make all] -.->|triggers| E

    G[Change main.c] ==>|rebuilds| B
    G ==>|rebuilds| E

    style A fill:#e3f2fd
    style C fill:#e3f2fd
    style B fill:#fff3e0
    style D fill:#fff3e0
    style E fill:#c8e6c9
    style F fill:#4caf50
    style G fill:#ffcdd2
Make tracks dependencies: change main.c → only main.o and firmware.elf rebuild (not hal.o).
The Good
- Universal: Installed on virtually every Unix-like system
- Explicit: You see exactly what commands run
- Simple concepts: Targets, dependencies, commands
- No abstraction overhead: What you write is what runs
The Problem
Have you ever tried to make a Makefile work on both Linux and Windows? Or switch from GCC to Clang? Every change cascades into editing dozens of lines.
Here’s what happened when I tried to add one new source file to a large project:
- Add the
.cfile to the source list - Add the corresponding
.ofile to the object list - Update the dependency chain
- Add include paths if it uses new headers
- Test and discover I typoed one of the paths
- 30 minutes gone
Make forces you to manually manage every detail. Great for learning. Terrible for productivity.
Question for you: How many times have you copy-pasted a Makefile from one project to another and spent an hour fixing paths?
CMake: The Modernizer
Why CMake Exists
CMake’s pitch is simple: “Stop writing build scripts. Write build configuration.”
Instead of spelling out every compilation command, you describe what you want:
cmake_minimum_required(VERSION 3.13)

# Set compilers for ARM Cortex-M
set(CMAKE_C_COMPILER "arm-none-eabi-gcc")
set(CMAKE_CXX_COMPILER "arm-none-eabi-g++")
set(CMAKE_ASM_COMPILER "arm-none-eabi-gcc")

# Set architecture
set(MCU "-mcpu=cortex-m0 -mthumb")
set(COMMON_FLAGS "${MCU} -fdata-sections -ffunction-sections -Wall")

# Add your sources
add_executable(firmware
    src/main.cpp
    hal/uart/uart_stm32.cpp
    platform/startup_stm32f072xb.s
    platform/STM32F0xx_HAL_Driver/Src/stm32f0xx_hal.c
)

# Link everything
target_link_libraries(firmware hal_library)
CMake reads this and generates a Makefile (or Ninja file, or Visual Studio project, or Xcode project…).
What CMake Actually Does
Let’s break down the embedded compilation pipeline:
flowchart TD
    A[Source Files<br/>.c .cpp .s] --> B[Preprocessor]
    B -->|Expands macros<br/>Resolves includes| C[Compiler]
    C -->|Generates| D[Object Files<br/>.o]
    E[Assembly .s] --> F[Assembler]
    F --> D
    D --> G[Linker]
    H[Linker Script<br/>.ld] --> G
    I[Libraries<br/>.a] --> G
    G -->|Combines| J[ELF File<br/>with debug symbols]
    J --> K[objcopy]
    K --> L[Binary .bin<br/>or HEX .hex]
    L --> M[Flash to MCU]

    N[CMake] -.->|Orchestrates| B
    N -.->|Orchestrates| C
    N -.->|Orchestrates| F
    N -.->|Orchestrates| G
    N -.->|Orchestrates| K

    style N fill:#ff9800,stroke:#e65100,stroke-width:3px
    style L fill:#4caf50
    style M fill:#2196f3
CMake orchestrates every step. You configure once; it handles the rest.
Real-World Example: Multi-Target Embedded Project
Imagine you’re building firmware that needs to run on:
- STM32F4 (Cortex-M4)
- STM32F0 (Cortex-M0)
- A host simulator for testing
With Make, you’d maintain three separate Makefiles. With CMake:
# Platform-specific settings
if(TARGET_PLATFORM STREQUAL "STM32F4")
    set(MCU "-mcpu=cortex-m4 -mfpu=fpv4-sp-d16 -mfloat-abi=hard")
    set(LINKER_SCRIPT "${CMAKE_SOURCE_DIR}/platform/STM32F4.ld")
elseif(TARGET_PLATFORM STREQUAL "STM32F0")
    set(MCU "-mcpu=cortex-m0 -mthumb")
    set(LINKER_SCRIPT "${CMAKE_SOURCE_DIR}/platform/STM32F0.ld")
else()
    # Host simulator - use native compiler
    set(MCU "")
endif()

# Same source code, different targets
add_executable(firmware ${SOURCES})
target_compile_options(firmware PRIVATE ${MCU})
Run cmake -DTARGET_PLATFORM=STM32F4 .. and you’re building for F4. Change to STM32F0 and rebuild. Same CMakeLists.txt. Zero manual editing.
Architecture:
graph TB
    A[CMakeLists.txt<br/>Single Source] --> B{Platform?}
    B -->|STM32F4| C[Cortex-M4 Config]
    B -->|STM32F0| D[Cortex-M0 Config]
    B -->|Simulator| E[Host Config]

    C --> F[arm-none-eabi-gcc<br/>-mcpu=cortex-m4]
    D --> G[arm-none-eabi-gcc<br/>-mcpu=cortex-m0]
    E --> H[gcc/clang<br/>native]

    I[Same Source Code] --> F
    I --> G
    I --> H

    F --> J[firmware_f4.elf]
    G --> K[firmware_f0.elf]
    H --> L[simulator]

    style A fill:#2196f3
    style I fill:#4caf50
The CMake Advantage
Cross-platform: Write once, build on Windows, Linux, macOS
IDE integration: VS Code, CLion, Eclipse all understand CMake
Toolchain management: Easily switch between GCC, Clang, IAR, Keil
Dependency tracking: Change one header? CMake knows what to rebuild
Modern syntax: Actually readable (compared to Make’s tab-sensitive chaos)
When CMake Falls Short
Here’s what CMake doesn’t solve:
- Hardware abstraction: Still writing your own HAL or using vendor libraries
- Portability: Your code isn’t portable just because your build system is
- Communication protocols: Need RPC? Serial? Bluetooth? Roll your own or find libraries
- Testing infrastructure: You’ll bolt on frameworks separately
- Toolchain downloads: You still manually install
arm-none-eabi-gcc
Which brings us to Pigweed.
Pigweed: The Game Changer
What Pigweed Provides
Google asked: “Why do embedded developers waste time on the same problems everyone else already solved?”
Pigweed’s answer: Package the build system, toolchain, HAL, protocols, logging, testing, and RPC into one framework.
It’s not just a build tool. It’s an entire embedded development ecosystem.
The Core Problem Pigweed Solves
Picture this scenario:
You write firmware for a temperature sensor. Works great on STM32. Now your customer wants it on ESP32. Then Nordic nRF52. Then a Linux gateway.
Traditional approach:
- Rewrite your UART driver for the new platform
- Rewrite your SPI driver
- Rewrite your logging system
- Rewrite your communication protocol
- Spend weeks debugging because byte ordering is different
- Repeat for the next platform
Pigweed approach:
// Same code on STM32, ESP32, nRF52, Linux:
pw::stream::Write(log_stream, "Temperature: ", temp);
pw::spi::Device.Write(sensor_data);
Cross-Platform Architecture:
graph TB
    A[Your Application Code] --> B[Pigweed Interfaces]

    B --> C[pw::stream]
    B --> D[pw::spi]
    B --> E[pw::uart]
    B --> F[pw::log]

    C --> G[STM32 HAL]
    C --> H[ESP32 SDK]
    C --> I[nRF52 SDK]
    C --> J[Linux]

    D --> G
    D --> H
    D --> I
    D --> J

    E --> G
    E --> H
    E --> I
    E --> J

    F --> G
    F --> H
    F --> I
    F --> J

    style A fill:#4caf50
    style B fill:#2196f3
    style G fill:#ff9800
    style H fill:#ff9800
    style I fill:#ff9800
    style J fill:#ff9800
Pigweed provides the hardware abstraction. You write to interfaces. Pigweed implements them on 20+ platforms.
Architecture: Not Just Libraries
1. Build System: Bazel
Pigweed uses Bazel, not CMake. Why?
Bazel was designed by Google for massive, multi-language, multi-platform projects:
# BUILD.bazel file
cc_binary(
    name = "blinky",
    srcs = ["main.cpp"],
    deps = [
        "//pw_system",
        "//modules/gpio",
    ],
)
Bazel targets represent exactly what you want to build:
//apps/blinky:simulator_blinky      # Run on host simulator
//apps/blinky:stm32_blinky           # Flash to STM32
//apps/blinky:rpc_client              # Python control interface
Bazel Dependency Graph:
graph TD
    A["//apps/blinky"] --> B[simulator_blinky]
    A --> C[stm32_blinky]
    A --> D[rpc_client]

    B --> E["//pw_system"]
    B --> F["//modules/gpio"]

    C --> E
    C --> F
    C --> G["//hal/stm32"]

    D --> H["//pw_rpc"]
    D --> I[Python libs]

    E --> J["//pw_log"]
    E --> K["//pw_thread"]

    style A fill:#4caf50
    style B fill:#2196f3
    style C fill:#ff9800
    style D fill:#9c27b0
One command builds the right target:
bazel build //apps/blinky:stm32_blinky
2. RPC: Talk to Your Hardware Like It’s a Web Service
What’s RPC? Remote Procedure Call lets you call functions on another device as if they were local. Instead of:
# Traditional approach:
serial.write("BLINK,200,3\n")  # Send text command
response = serial.readline()    # Parse text response
if response == "OK":
    print("Success")
You write:
# RPC approach:
device.rpcs.blinky.Blink(interval_ms=200, blink_count=3)
# That's it. Function call. Done.
The RPC system handles serialization, transport, deserialization, and error handling automatically. It’s like calling a web API, but for embedded devices.
Here’s where Pigweed gets really interesting.
Define your device interface in a .proto file:
syntax = "proto3";
package blinky;

service Blinky {
  rpc ToggleLed(pw.protobuf.Empty) returns(pw.protobuf.Empty);
  rpc Blink(BlinkRequest) returns (pw.protobuf.Empty);
}

message BlinkRequest {
  uint32 interval_ms = 1;
  optional uint32 blink_count = 2;
}
Pigweed auto-generates:
- C++ server code (runs on your embedded device)
- Python client code (runs on your PC)
- Efficient binary protocol (minimal overhead)
Now control your device from a Python shell:
# Connect to device over serial
device = pw_device.Device('/dev/ttyUSB0')

# Call RPC methods like they're local functions
device.rpcs.blinky.Blinky.Blink(interval_ms=200, blink_count=3)
# LED blinks 3 times!

# Read sensor data
response = device.rpcs.board.Board.OnboardTemp()
print(f"Temperature: {response.temp}°C")
RPC Communication Flow:
sequenceDiagram
    participant PC as Python Client<br/>(Your PC)
    participant Serial as Serial/USB
    participant MCU as C++ Device<br/>(MCU)

    PC->>PC: device.rpcs.blinky.Blink(interval_ms=200)
    PC->>Serial: Binary protobuf message
    Serial->>MCU: 0x0A 0x02 0xC8 0x00...
    MCU->>MCU: Deserialize protobuf
    MCU->>MCU: Call Blink() method
    MCU->>MCU: GPIO toggle
    MCU->>Serial: Response (Status.OK)
    Serial->>PC: Binary response
    PC->>PC: Deserialize to Python object

    Note over PC,MCU: Type-safe, compact, no manual parsing!
Outcome:
- No parsing text commands
- No ASCII protocol debugging
- No manual serialization
- Type-safe communication between Python and embedded C++
Change the protocol? Edit the .proto file. Regenerate. Done.
3. Hardware Modules
Pigweed includes battle-tested modules:
| Module | What It Does |
|---|---|
pw_log | Multi-backend logging (UART, RTT, file) |
pw_uart | Serial communication abstraction |
pw_spi | SPI interface |
pw_i2c | I2C interface |
pw_bluetooth | Bluetooth HCI |
pw_rpc | Remote procedure call system |
pw_thread | Threading abstraction |
pw_sync | Synchronization primitives |
pw_string | Fixed-size strings (no dynamic allocation) |
pw_containers | Fixed-size data structures |
pw_console | Interactive debugging console |
All with platform-neutral interfaces and implementations for major MCUs.
4. Embedded-Friendly Standard Library
Standard C++ on embedded is risky:
std::stringuses dynamic allocation → heap fragmentationstd::vectorcan run out of memory- Exceptions aren’t always supported
Pigweed provides alternatives:
// Instead of std::string:
pw::InlineString<32> fixed_string = "Hello";

// Instead of std::vector:
pw::Vector<int, 10> fixed_vector;  // Max 10 elements, no heap
5. Complete Development Environment
Run one command:
source bootstrap.sh
Pigweed downloads and sets up:
- Correct compiler versions
- Bazel
- Python environment
- All dependencies
No more “works on my machine” because everyone has the exact same toolchain.
Real-World Workflow: Air Quality Sensor
Pigweed’s “Sense” tutorial demonstrates a complete project:
1. Device Firmware (C++):
// Implement the RPC service
class BoardService : public pw_rpc::Board::Service {
  pw::Status OnboardTemp(pw::protobuf::Empty::Message& request,
                         board::OnboardTempResponse::Message& response) {
    response.temp = ReadTemperatureSensor();
    return pw::OkStatus();
  }
};
2. Python Client:
# Interactive REPL
>>> device.rpcs.board.Board.OnboardTemp()
(Status.OK, board.OnboardTempResponse(temp=22.5))

>>> device.rpcs.blinky.Blinky.ToggleLed()
(Status.OK, pw.protobuf.Empty())
What’s a REPL? Read-Eval-Print Loop is an interactive shell where you type commands and immediately see results. Think Python’s >>> prompt or your browser’s JavaScript console.
RPC + REPL = Powerful Debugging:
- Type a command → RPC serializes it → Device executes → Result appears instantly
- No recompiling firmware to test a single function
- No printf debugging to see sensor values
- Just interactive exploration of your hardware
It’s the difference between:
- Without REPL: Change code → Rebuild → Flash → Test → Repeat (5 minutes per cycle)
- With REPL: Type command → See result (5 seconds)
3. Build and Flash:
# Build for hardware
bazel build //apps/sense:stm32_sense

# Or run on simulator for testing
bazel run //apps/sense:simulator_sense
All from the same codebase.
The Tradeoffs
When Pigweed Makes Sense:
- Large projects (multiple engineers, multiple platforms)
- Need professional debugging tools
- Want standardized communication (RPC)
- Building a product family with shared code
- Have time to climb the learning curve
When It Might Be Overkill:
- Simple blinky projects
- One-off prototypes
- Highly resource-constrained (< 32KB flash)
- Team unfamiliar with Bazel and Protocol Buffers
- Quick turnaround needed (learning curve is steep)
Note: Pigweed front-loads complexity; it requires an initial investment of time and learning for long-term benefits.
Which One Should You Use?
Let’s be practical. Here’s my decision tree:
flowchart TD
    A[Starting New Project?] --> B{Project Size?}
    B -->|< 10 files<br/>Learning| C[Make]
    B -->|10-1000s files<br/>Production| D{Requirements?}
    B -->|Large scale<br/>Multi-platform| E{Team & Budget?}

    D -->|Just build<br/>Single platform| F[Make/CMake]
    D -->|Multi-platform<br/>IDE integration| G[CMake]
    D -->|Need HAL/RPC<br/>Protocols| E

    E -->|Small team<br/>Quick deadline| G
    E -->|Large team<br/>Long-term| H[Pigweed]

    I[Existing Project?] --> J{Current tool?}
    J -->|Make struggling| G
    J -->|CMake scaling| K{Worth migration?}
    K -->|Yes| H
    K -->|No| G

    style C fill:#f9f9f9
    style G fill:#2196f3
    style H fill:#4caf50
Use Make If:
- ✅ Tiny project (< 10 source files)
- ✅ One-time prototype
- ✅ You’re learning embedded basics
- ❌ Don’t use for production or team projects
Use CMake If:
- ✅ Most embedded projects (10-1000s of files)
- ✅ Cross-platform builds
- ✅ Multiple targets (dev board + production hardware)
- ✅ IDE integration matters
- ✅ Team with varying skill levels
- ❌ Don’t expect hardware abstraction or protocols
Use Pigweed If:
- ✅ Large-scale product development
- ✅ Multiple hardware platforms
- ✅ Need RPC and serialization
- ✅ Team of experienced engineers
- ✅ Long-term maintenance
- ❌ Don’t use for quick prototypes or tiny teams
The Hybrid Approach
Here’s what professionals actually do:
Phase 1 (Prototype): Start with CMake
Phase 2 (Production): Migrate critical modules to Pigweed
Phase 3 (Product Family): Full Pigweed infrastructure
You don’t have to choose just one.
Comparison Table
| Aspect | Make | CMake | Pigweed |
|---|---|---|---|
| Learning Curve | Days | Weeks | Months |
| Setup Time | Minutes | Hours | Days |
| Long-term ROI | Low | High | Very High |
| Team Size | 1-2 | 1-20 | 5+ |
| Cross-platform | Manual | Automatic | Automatic |
| Toolchain Management | Manual | Manual | Automatic |
| Hardware Abstraction | None | None | Comprehensive |
| RPC/Protocols | DIY | DIY | Built-in |
| Testing Framework | DIY | Bolt-on | Integrated |
| IDE Support | Basic | Excellent | VS Code |
| Industry Adoption | Universal | Very High | Growing |
| Best For | Learning | Production | Enterprise |
Final Thoughts
Make taught us build automation exists.
CMake modernized how we configure builds.
Pigweed is reimagining what embedded development could be.
Choosing a tool depends on project size, team resources, and long-term maintenance goals.
Starting a weekend blinky project? CMake is probably perfect.
Trying to build the next generation of IoT devices for a Fortune 500 company? Pigweed might save you months.
Maintaining a 15-year-old product with crusty Makefiles? Maybe cleaning those up is better than rewriting everything.
Tool choice affects workflow and maintenance; select the one that fits your constraints and goals.
Resources
- A. Mahmutbegović, C++ in Embedded Systems: A practical transition from C to modern C++, Packt Publishing, 2024.
CMake:
- Official Tutorial: https://cmake.org/cmake/help/latest/guide/tutorial/
- Modern CMake: https://cliutils.gitlab.io/modern-cmake/
Pigweed:
- Official Site: https://pigweed.dev/
- Getting Started: https://pigweed.dev/docs/get_started/
- Sense Tutorial: https://pigweed.dev/showcases/sense/
Further Reading:
- “The Architecture of Open Source Applications” - Make and CMake chapters
- Google’s Bazel documentation for understanding Pigweed’s build system